/
How to Schedule Audio
How to Schedule Audio
- Tyler Stapleford (Deactivated)
Owned by Tyler Stapleford (Deactivated)
Last updated: Apr 19, 2019
NTL Studio allows you to have a library of audio loaded onto a unit and allows you to either make playlists that you can schedule or select singular songs from your library to play.
- Load Your Audio into the Library
- Direct Connect to a unit, or create a Connect-Back or Load
- Once Connected you will be able to right click in the library and a context menu will appear
- Right Click on the Library - Select Add Files
- Select the Files that you would like to upload - You can select multiple at one time
- Once all the files are selected press Open
- Create a Playlist (Optional)
- Right Click on the Playlist Section
- Select Add Playlist - You can also select add from Genre if you would like to make a genre based playlist
- Drag and drop files from your playlist onto your playlist - If you leave a playlist empty it will be removed
- Verify that files are in the playlist
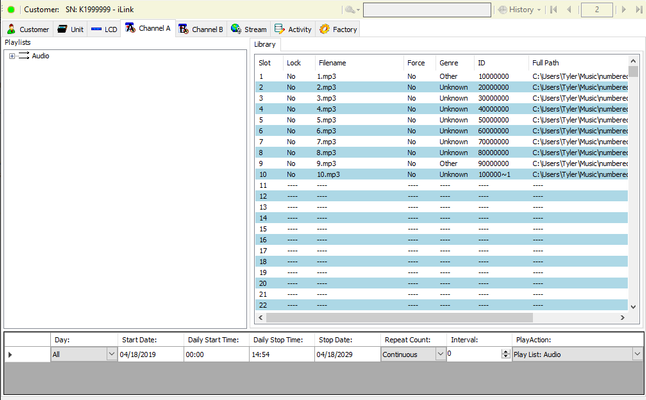
- Schedule the audio
- Right Click on the Bottom Portion to Schedule and Set your Audio
- Select Add Default Play Schedule
- Selecting Quick-Play will Put all songs in your Library into a playlist and put it on a 24 hour schedule
- Select your playlist or audio file in the Play Action Field
- Set your start and stop time and date
- Upload Audio or Schedule CB/Load
, multiple selections available,
Related content
How to use Interval to schedule reoccurring messages
How to use Interval to schedule reoccurring messages
More like this
Audio does not load to TELink 700a
Audio does not load to TELink 700a
More like this
Unit Not Playing any Audio
Unit Not Playing any Audio
More like this
How to Set up Email Notifications
How to Set up Email Notifications
More like this
NTL Studio Network Configuration
NTL Studio Network Configuration
More like this
Message slots 9 to 99 do not play
Message slots 9 to 99 do not play
More like this